Setting up a local network and WLAN on a MIKROTIK routerboard
A Local Network for internet access through Ethernet ports and Wireless LAN can be set up in the following steps:
-
Step 1: Create a WPA/WPA2 security profile for secure data transmission.
- 1.1 Go to Wireless -> Security Profiles. Click on ‘+’.
- 1.2 Enter desired name of security profile. Select ‘WPA2 PSK’ as Authentication type.
- 1.3 Enter desired WPA2 PSK (password), then click Apply & OK.
The purpose of setting up a WPA2 security profile, or in simple terms a WiFi password is to prevent unauthorized access to your network resources. Only those with the passphrase will be able to connect to the WiFi. The profile that will be created can be applied to the WiFi interface that you enable on the MikroTik Routerboard.
-
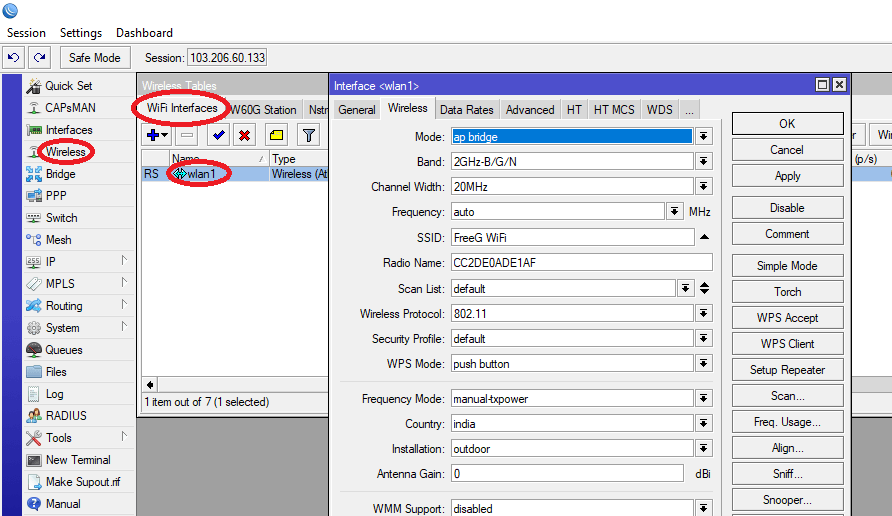
Step 2: Set up the Wireless LAN interface

- 2.1 Go to Wireless -> WiFi interfaces
- 2.2 Click on ‘wlan1’
- 2.3 In the ‘Wireless’ tab, click on ‘Advanced Mode’
Set the following: Mode: ap bridge
Band: 2GHz-B/G/N
Channel Width: 20MHz
Frequency: auto
SSID: (Your desired SSID / WiFi identifier)
Wireless Protocol: 802.11
Security profile: The security profile created in step
Country: india
Installation: indoor
Click on ‘Enable’, then ‘Apply’ and OK.
A WLAN (Wireless LAN) interface is used to connect one or more devices to a network wirelessly. Devices such a laptops, mobile phones, tablets etc can be wirelessly connected to internet via WiFi.
-
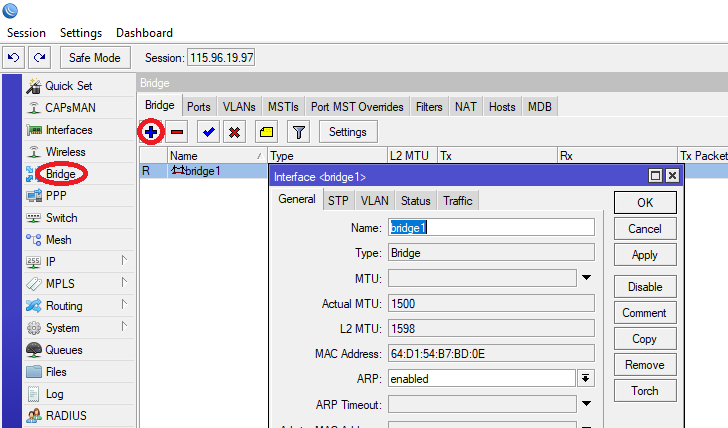
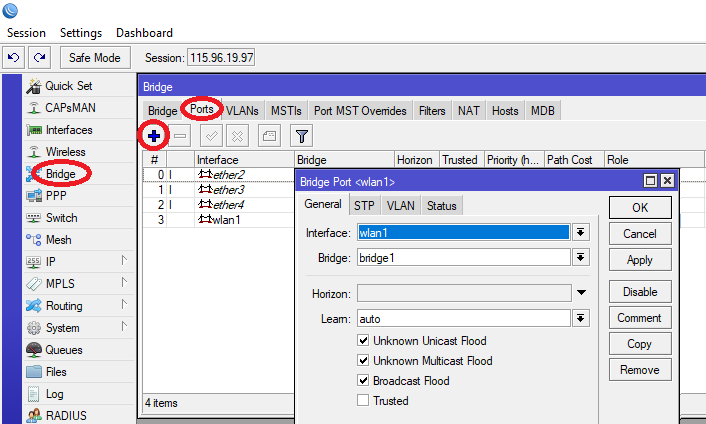
Step 3: Bridge all the Ethernet ports to be used as LAN ports
- 3.1 Go to Bridge and click on ‘+’, then click OK.
- 3.2 Go to Bridge -> Ports
In telecommunication networks, a bridge is an entity that logically connects all the Ethernet interfaces belonging to a single LAN network together. The Ethernet ports on a MikroTik Routerboard can be bridged together in the following manner:
-
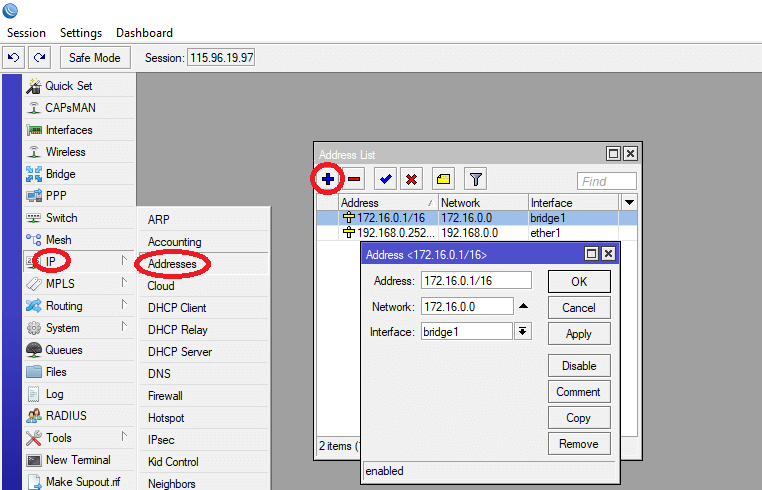
Step 4: Assign an IP address to the bridge interface
- 4.1 Go to IP -> Addresses.
- 4.2 Click on ‘+’ to add a new entry.
- 4.3 Enter an address along with subnet mask eg. ‘172.16.0.1/16’
- 4.4 Select ‘Interface’ as ‘bridge1’. Click ‘Apply’, then OK.
- 4.5 The assigned IP here becomes the gateway to the MikroTik router.
-
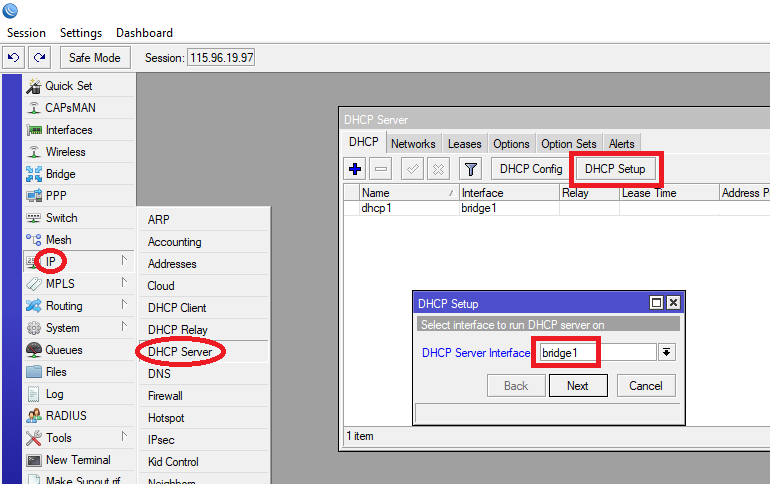
Step 5: Create a DHCP server on the bridge interface
- 5.1 Go to IP -> DHCP Server -> Click on ‘DHCP Setup’. Select the server interface as ‘bridge1’.
- 5.2 DHCP Address Space: 172.16.0.0/16
- 5.3 Gateway: 172.16.0.1
- 5.4 Addresses to give out: 172.16.0.2-172.16.255.254
- 5.5 Lease time: 6 hrs (06:00:00)
- 5.6 Lease time: 6 hrs (06:00:00)
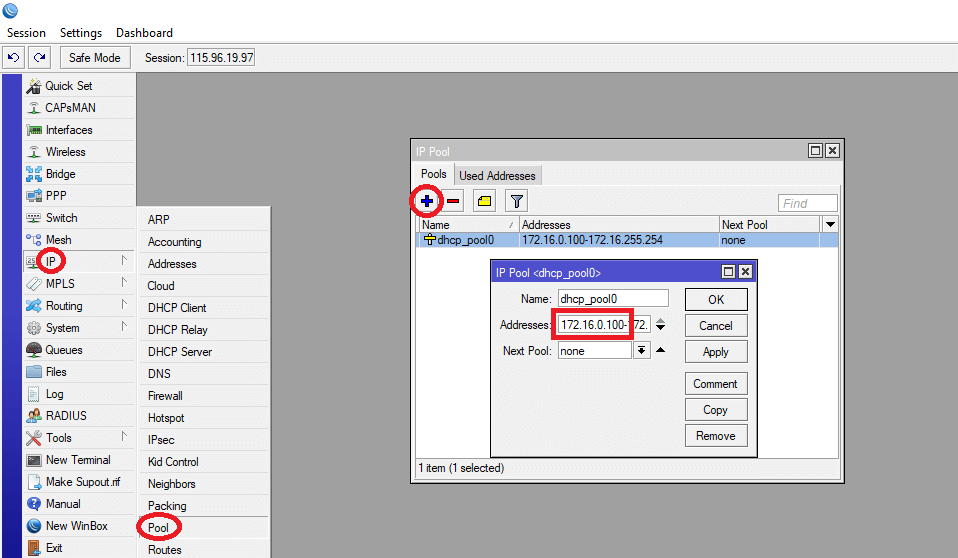
- 5.7 Go to IP -> Pool.
Modify the start of pool from 172.16.0.2 to 172.16.0.100 as some IP addresses can be reserved for manual IP assignment for internal devices such as a DVR or Biometric device.
-
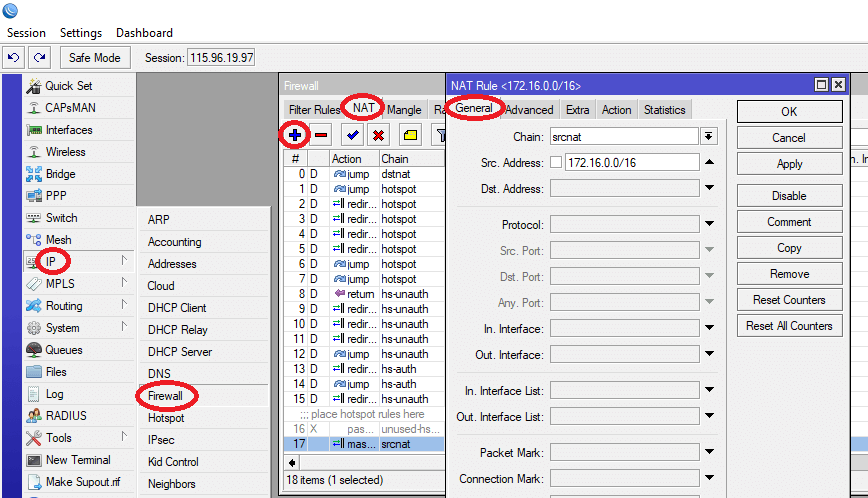
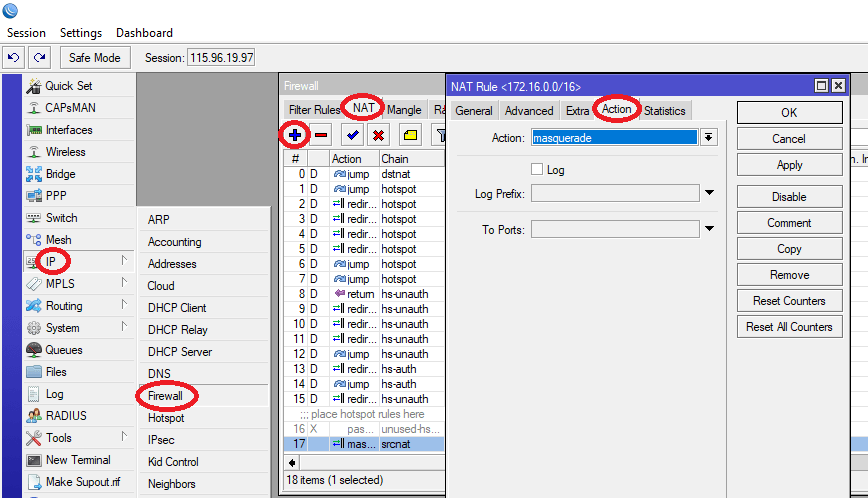
Step 6: Set up NAT masquerade for the LAN clients.
- 6.1 Add a NAT Firewall rule to masquerade LAN IP addresses
- 6.2 Go to IP -> Firewall NAT. Click on ‘+’.
- 6.3 General: Chain: srcnat
- 6.4 Src. Address: 172.16.0.0/16
- 6.5 In the ‘Action’ tab, select
- 6.6 Action: masquerade
- 6.7 Click ‘Apply’, then OK.
NAT is short for Network Address Translation. NAT is an Internet standard that enables a local-area network (LAN) to use one set of IP addresses for internal traffic and a second set of addresses for external traffic, so all outgoing traffic from the MikroTik Routerboard with a LAN IP will be stamped with a public IP.