CONFIGURING UNIFI ACCESS POINTS ON A WEB-HOSTED CONTROLLER
The biggest advantage of having a UniFi set up configured through a web-hosted controller is that minor changes in configuaration, such as changing SSIDs or Passwords, creating & updating guest policies etc. can be done any time, from anywhere on the internet, instead of needing to be at the location where the UniFi set up is in place.
Pre-requirements:
- Software to be pre-installed:-
- 1) Windows or Linux PC/Laptop
- 2) Angry IP Scanner - https://angryip.org/download
- 3) PuTTY (if using Windows) - https://www.putty.org
Following are the steps to configure a UniFi Access Point using a Web-hosted controller software:-
-
1) Connect a UniFi AP to the MikroTik Routerboard, or any network controller of your choice. To do this, connect one CAT6 patch cord from the LAN port of the network controller to the LAN port on the UniFi PoE adapter for data. Another patch cord is to be connected from the PoE port on the adapter to the Ethernet port on the Access Point for Data+Power.
Note: If you’re using a pre-configured UniFi AP, then it needs to be reset first. The reset button should be located near the ethernet port on the AP. Use a pin to press down on the reset button, until the indicator LED on the AP flashes colors alternately. Then power down the AP, and replug it. The AP will then be reset and ready for adoption. - 2) Connect a PC/Laptop wirelessly or through ethernet to the network controller. The laptop/PC is to be on the same network as the UniFi device.
-
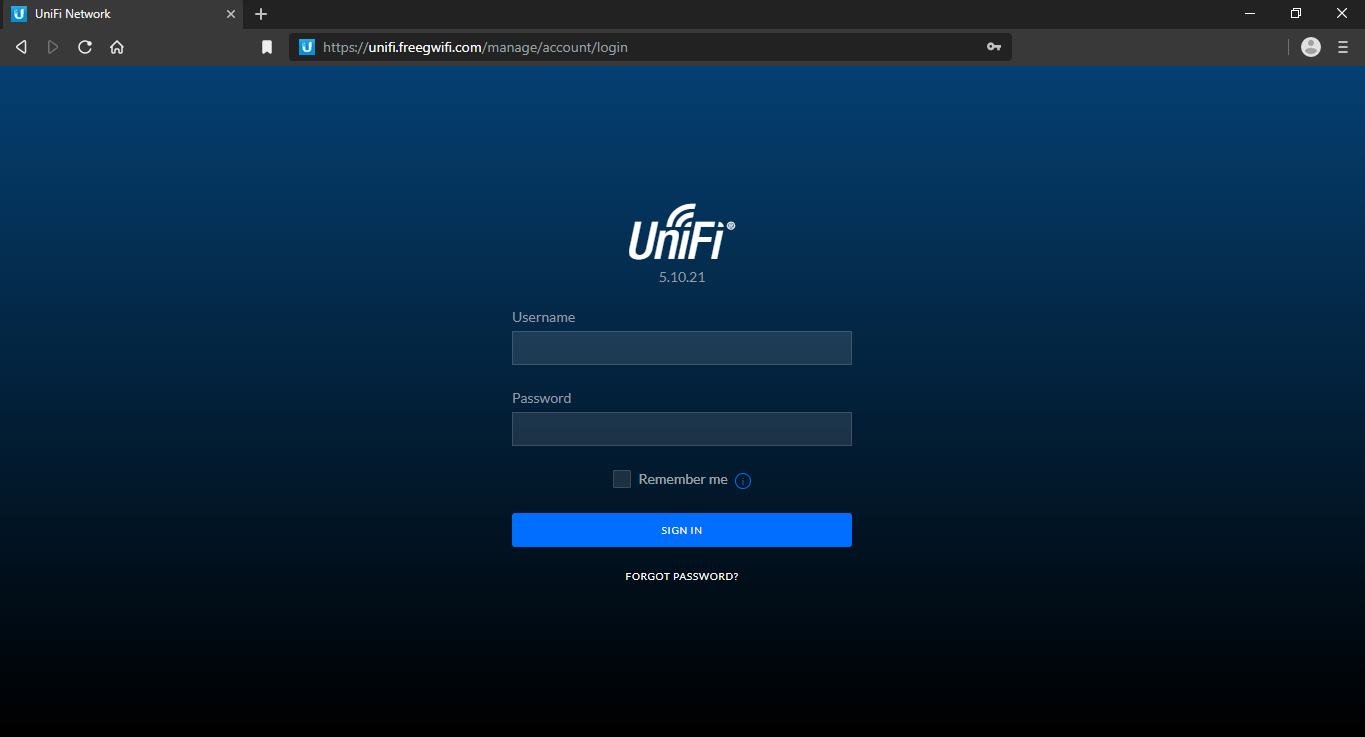
3) Open any browser of your choice and go to https://unifi.freegwifi.com. This is the UniFi web-hosted controller provided by FreeG WiFi meant for remotely managing UniFi devices. Log in using the credentials provided to you.
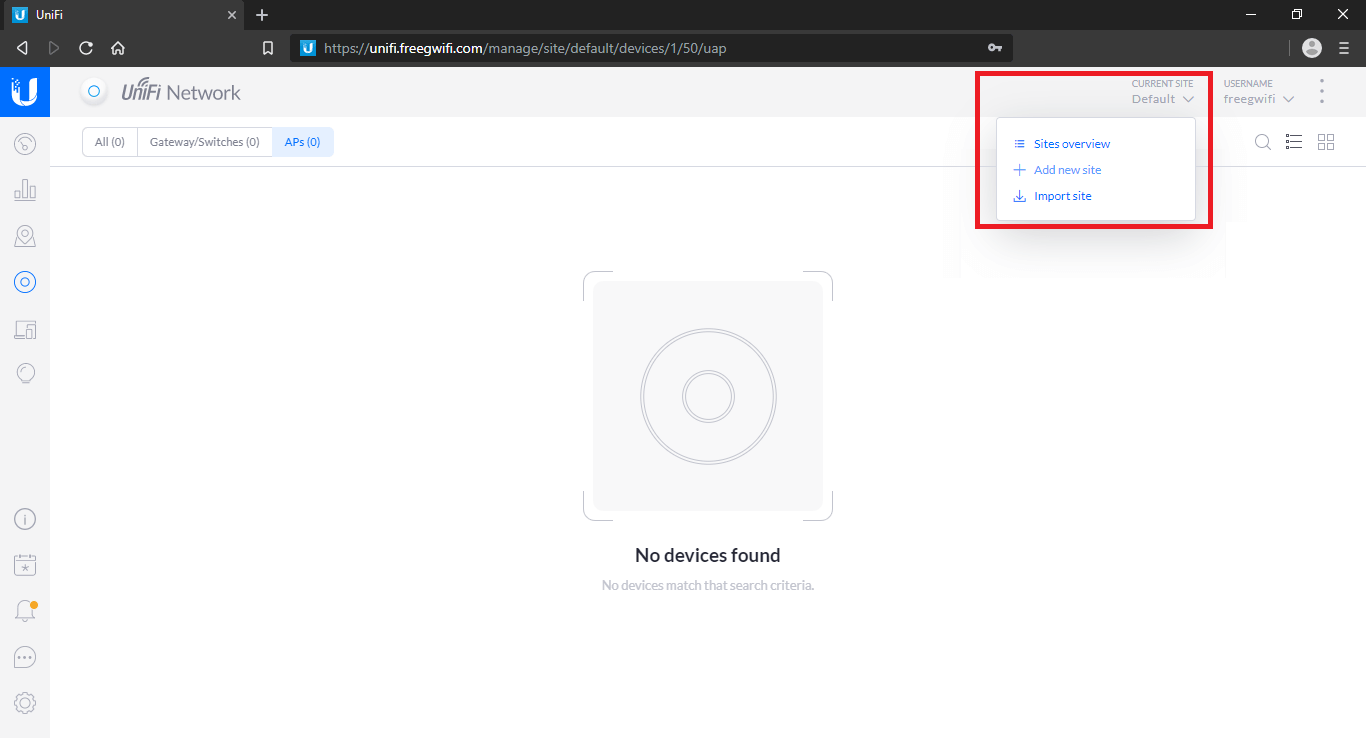
In case you don’t have the credentials, ask your relationship manager to send it to you or drop us an email at support@freegwifi.com - 4) On the top-right, click on Current Sites -> ‘Add new site’. It is advisable to host UniFi devices set up at different locations on separate sites for convenience.
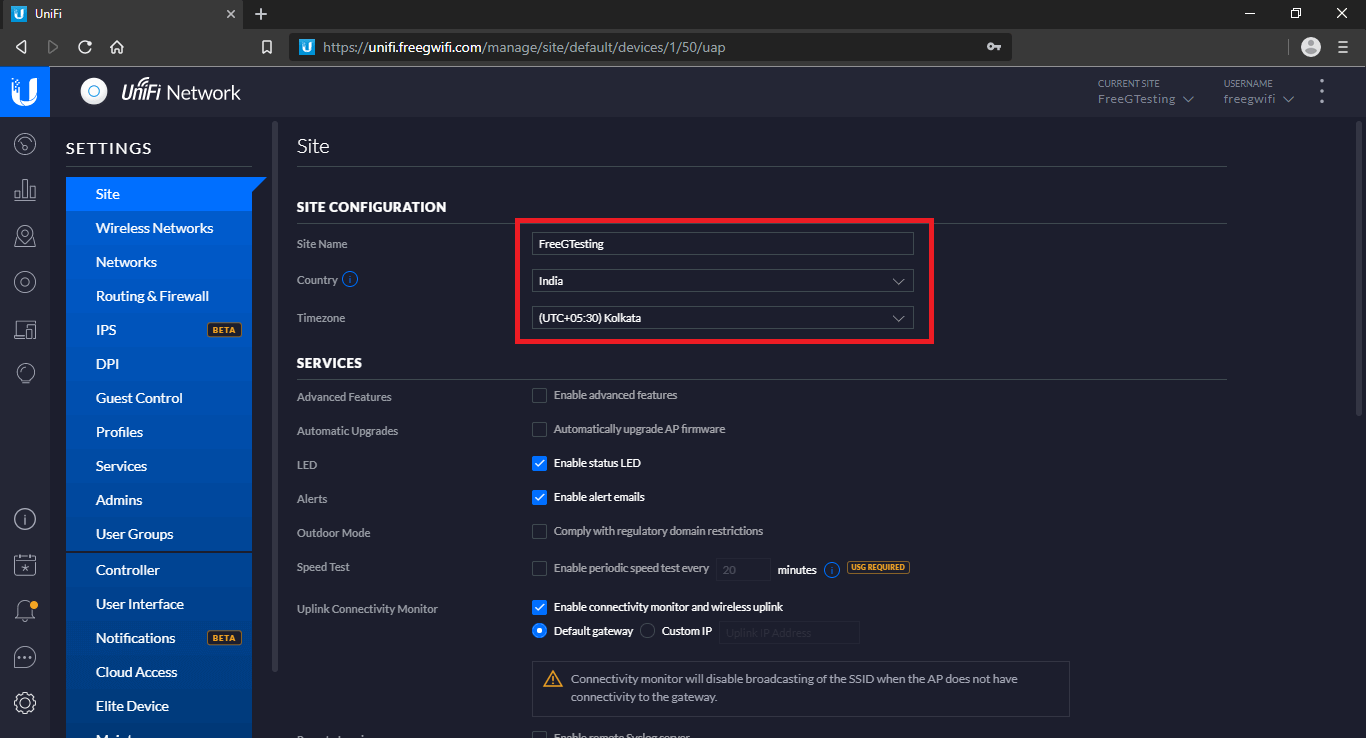
- Use location name as site name, In the case seen below, we have named the site as ‘FreeGTesting’. Click ‘Submit’.
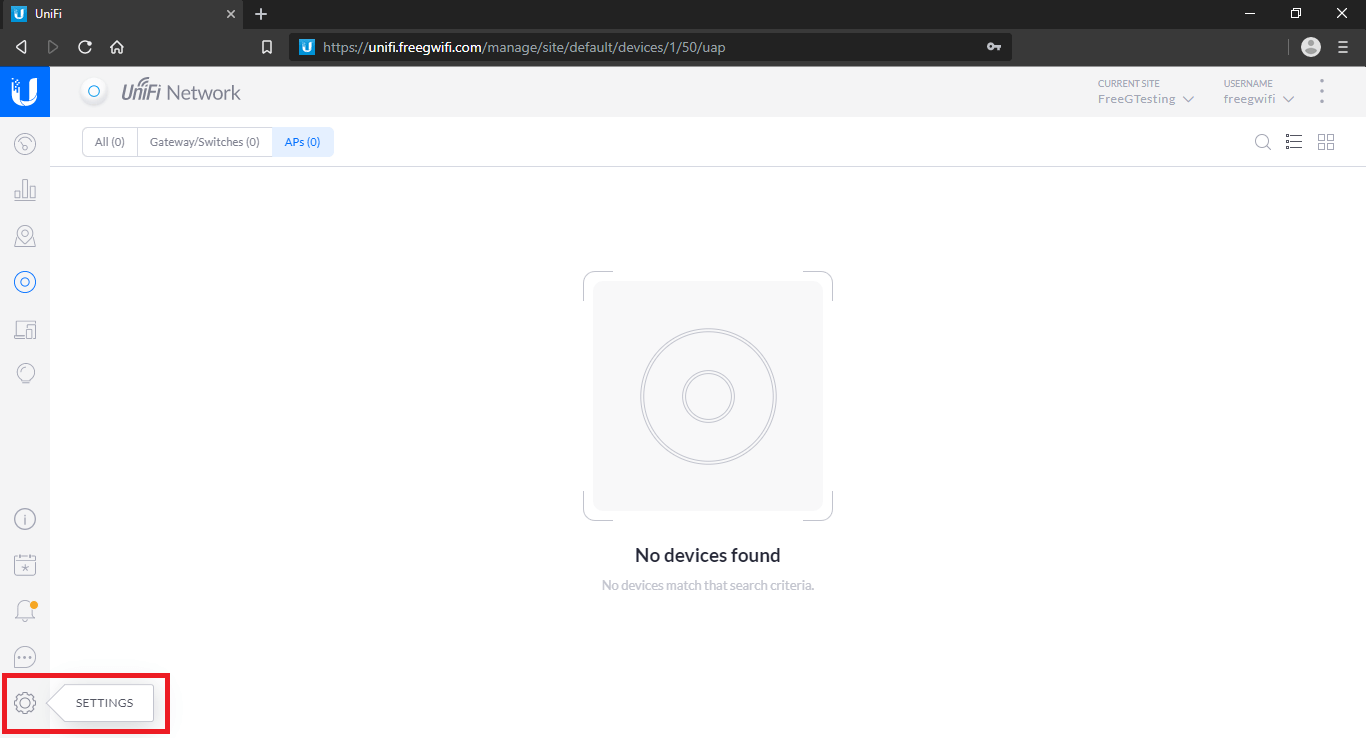
- 5) On the bottom-left corner, click on ‘Settings’.
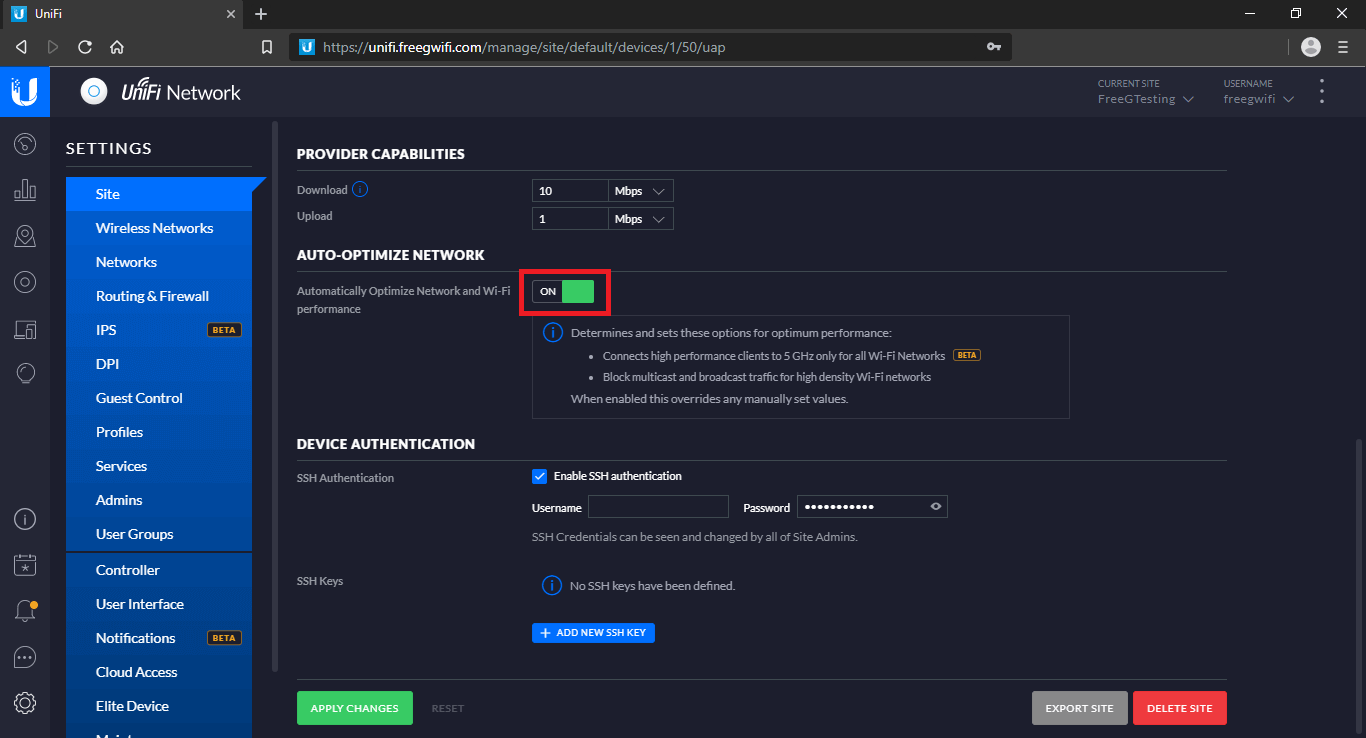
- In ‘Site’ settings, set your country and TimeZone - in this case, we have selected India and Time Zone as UTC+05.30.
- Also enable ‘Network Optimization’. It will enable 5GHz capable devices like iPhones & MacBooks to automatically connect to the 5GHz band.
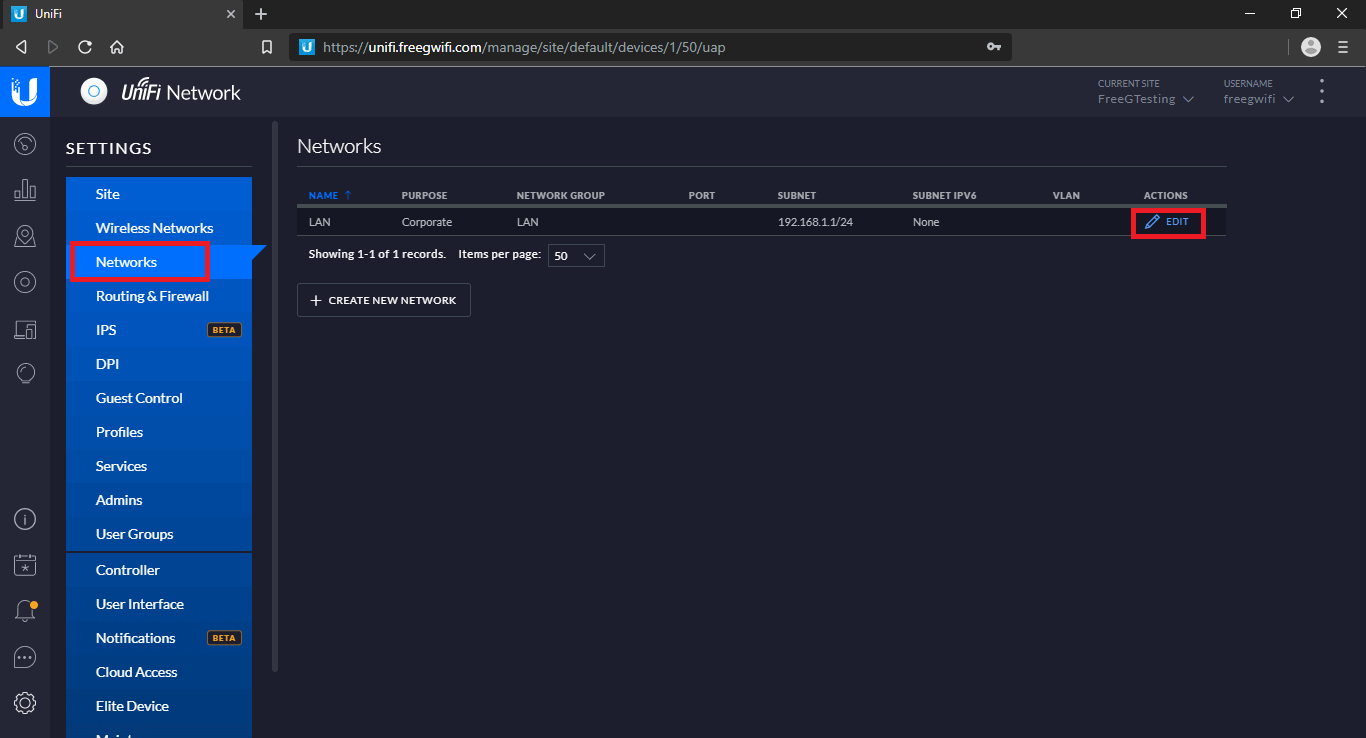
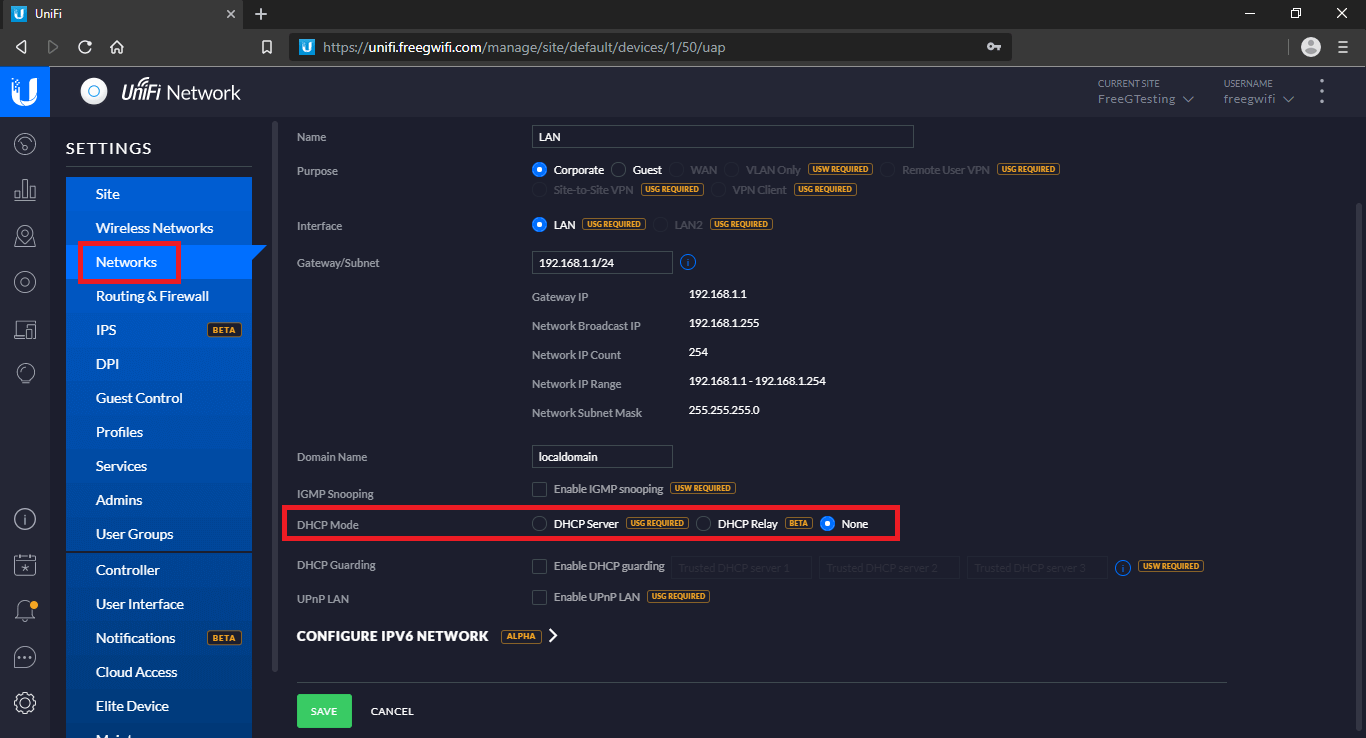
- 6)Go to Networks -> Click ‘Edit’ on LAN.
- Set DHCP mode to ‘none’, then click on Save.
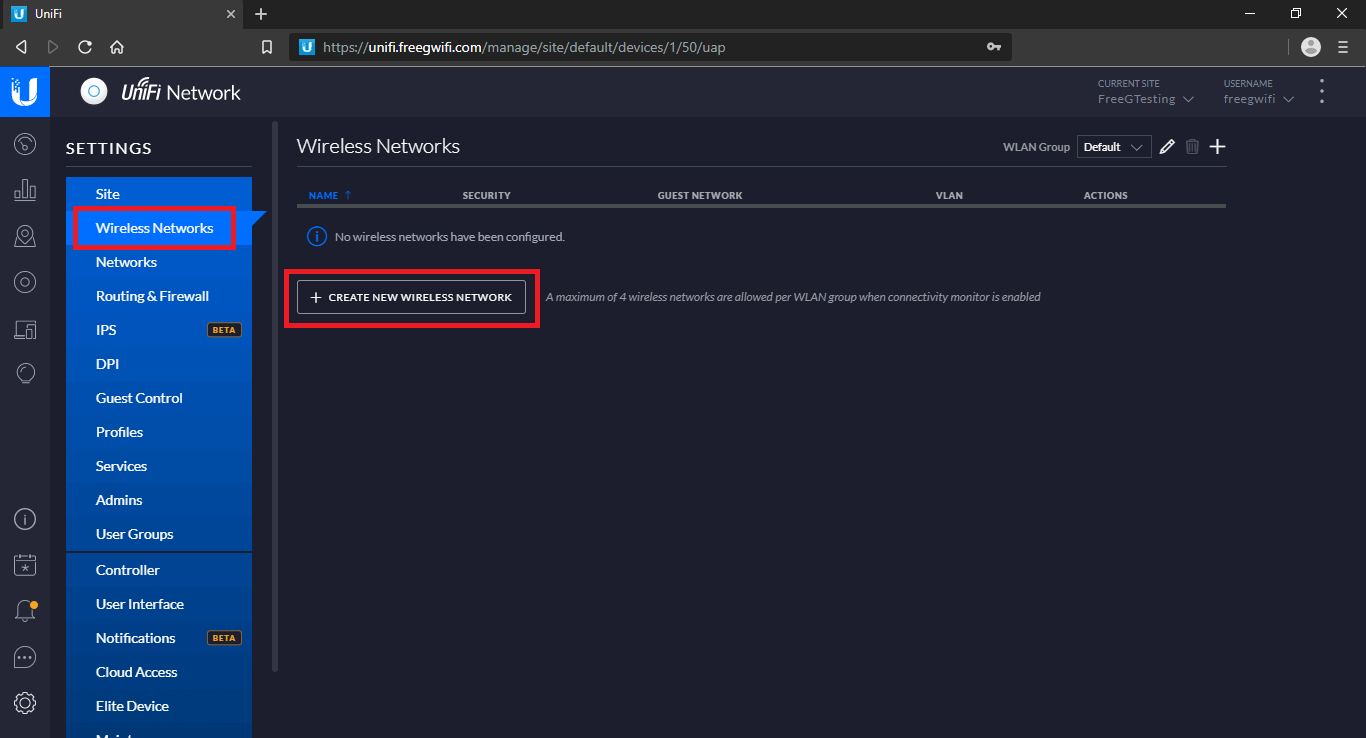
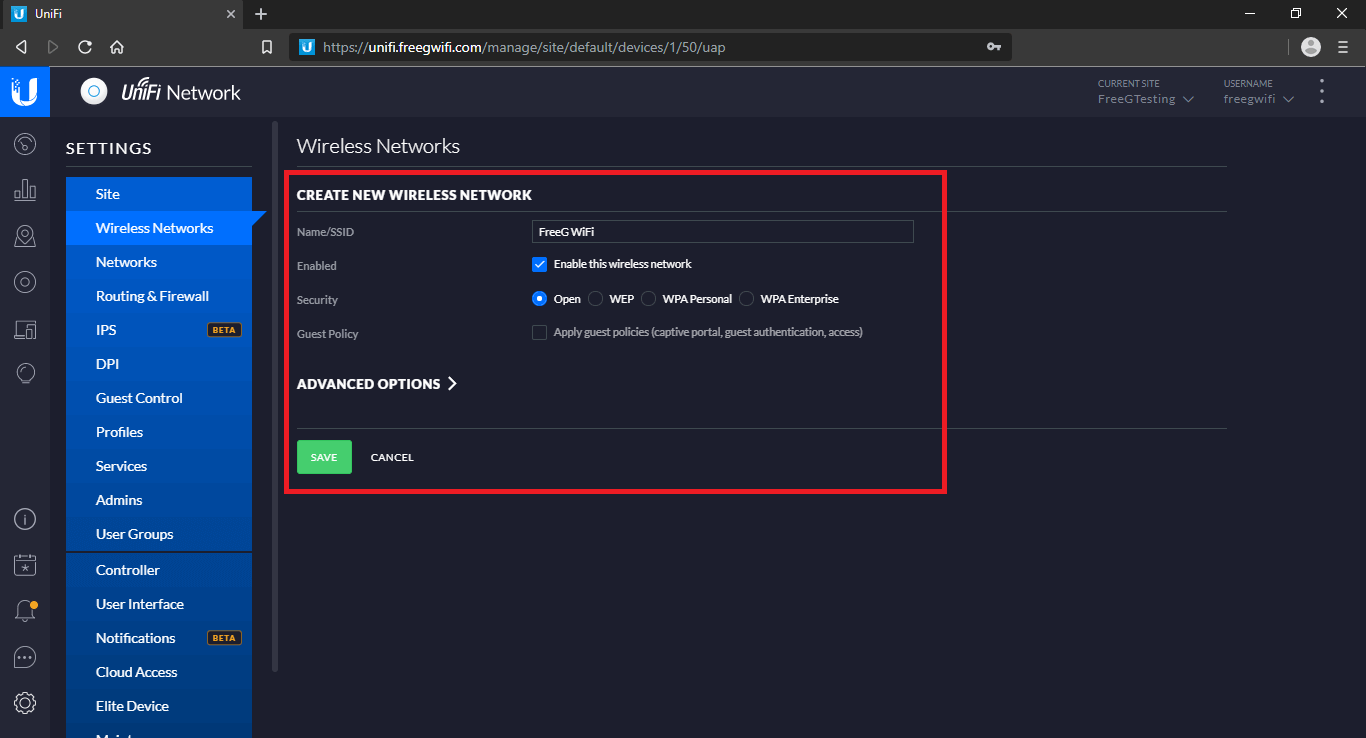
- 7) Go to Wireless Networks, Click on ‘+ Create new wireless network’.
- Set the SSID/Password/VLAN association etc, then click ‘Save’.
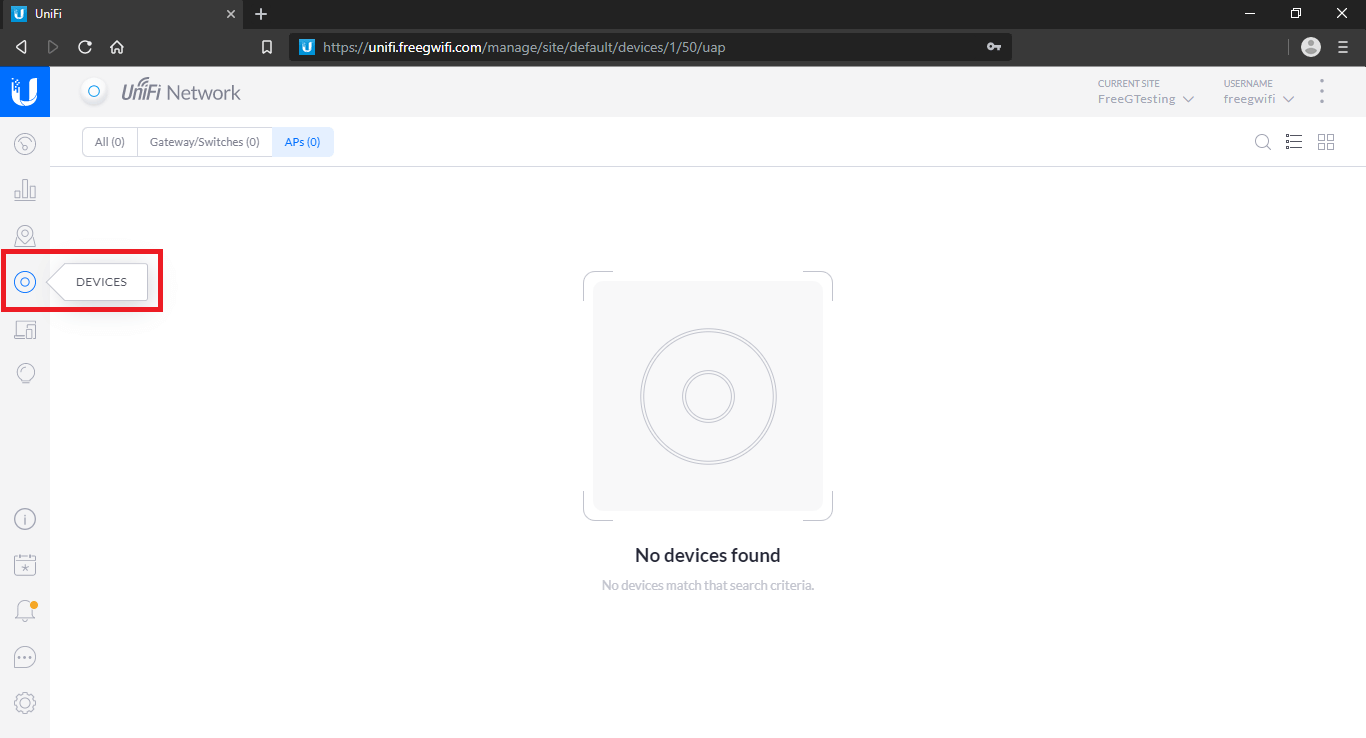
- 8) On the left-hand corner, click on Devices. Select ‘APs’.
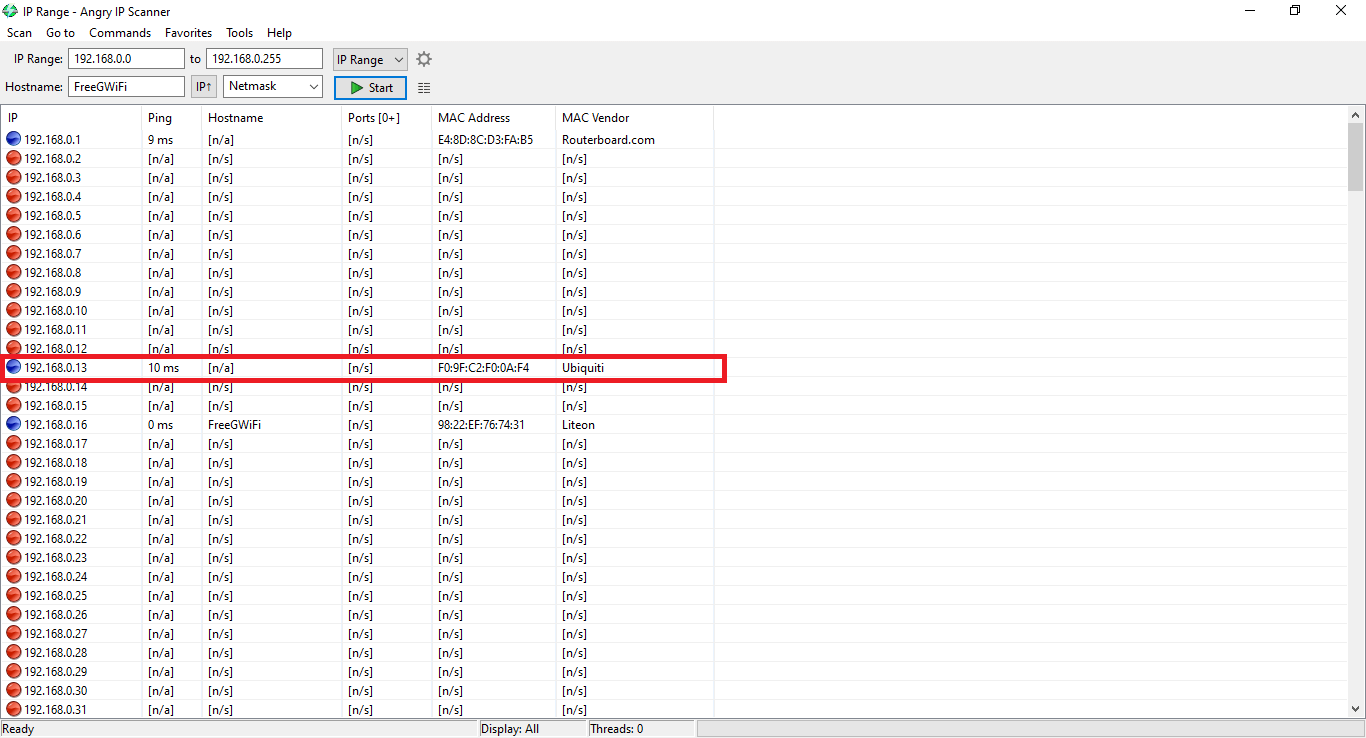
- 9) Using Angry IP Scanner, find out the IP address dynamically assigned to the UniFi AP.
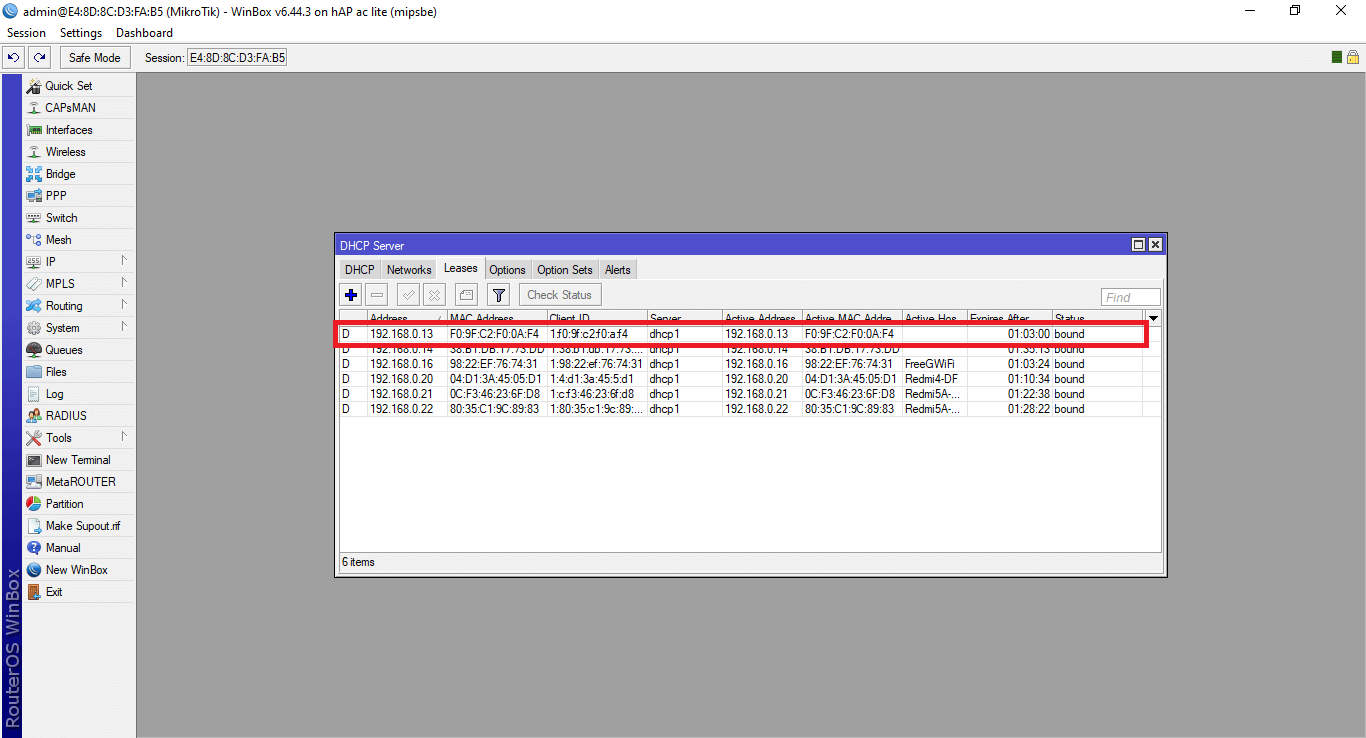
- Alternately, if using a MikroTik controller, the assigned IP can be looked up in IP -> DHCP Server -> Leases.
-
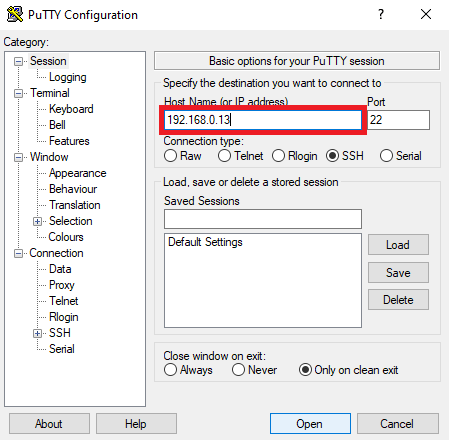
10) After finding out the IP address of the UniFi AP, use a SSH client such as PuTTY to log in to the AP. The default UniFi username and password for SSH is ubnt.
Note: If using a Linux laptop/PC, it is possible to SSH in to the UniFi device using the Linux terminal itself. For this, open terminal, then log in using the following command:
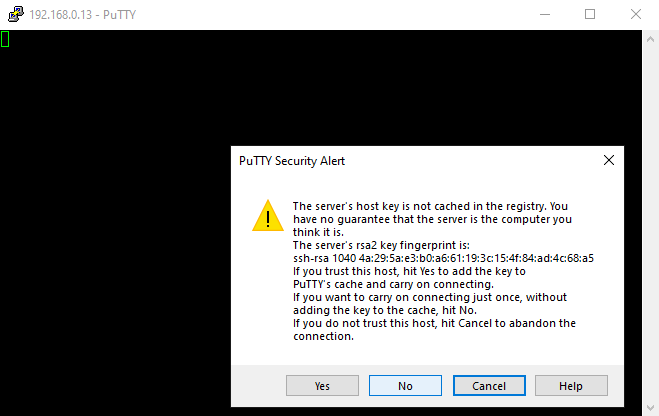
ssh ubnt@”IP address of UniFi” eg. ssh ubnt@192.168.0.13. - Click ‘No’ when the PuTTY security alert pops up on Windows. On Linux, enter ‘N’.
-
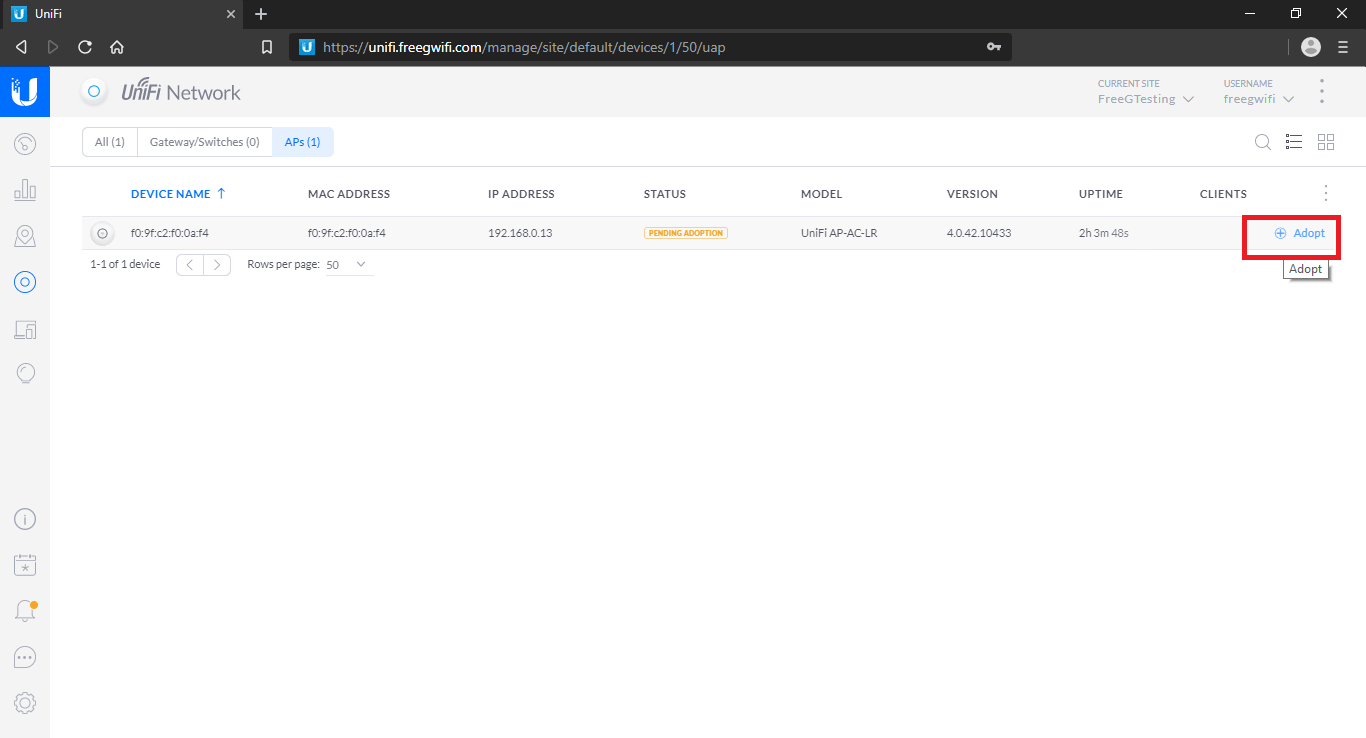
11) Enter the following command in the SSH terminal:-
set-inform http://unifi.freegwifi.com:8080/inform.
This will enable the UniFi AP to be detected in the Devices section on the UniFi Site. Enter this command 2-3 times if the UniFi AP does not get detected on the site at the first attempt. - 12) When the UniFi AP is detected on the site, click on ‘Adopt’. The site will then start provisioning the AP with the network and wireless settings.
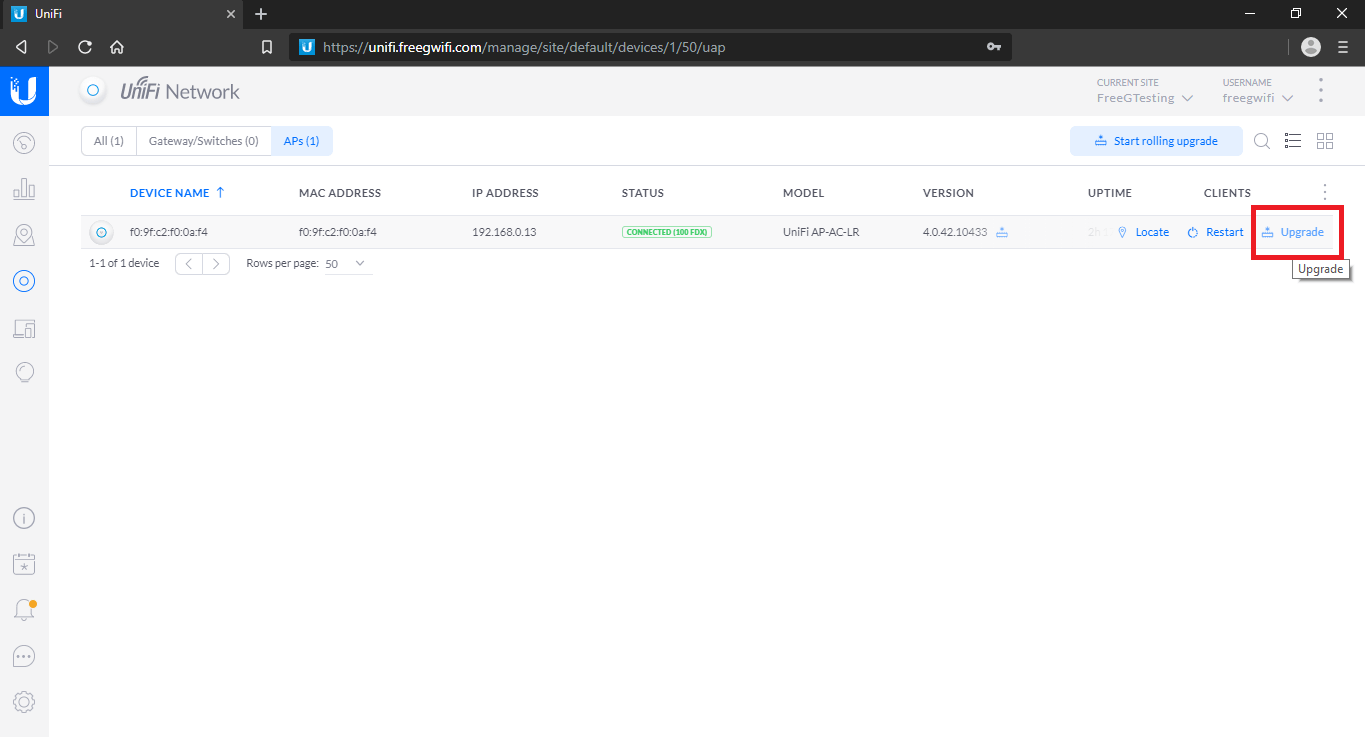
- 13) Once the provisioning is done, the AP status will show ‘Connected’. This indicates that the AP is ready to be deployed. Click on ‘Upgrade’ if you wish to upgrade the device firmware.